fish tank cabinet diy

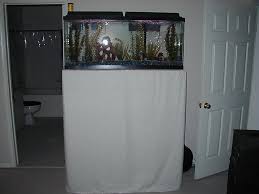
Aquarium cabinet AkvarierAquariumSaltvannsakvariumFerskvannsakvariumAquascapingSaltvannstankDIY Fish Tank StandFish Tank Stand Plan MoreDIY ADA style 60p Cabinet/Stand meets Exotic wood from OZ! - Page 2 - DIY Aquarium Projects - Aquatic Plant CentralFish Tank Stand BuildTropical Aquarium 60x24x18 Classic Cabinet Design in Natural Touch Finish from Prime Aquariums Ltd - Your custom fish tank manufacturerRustique mood for this natural wood element , holding a reef tank , a beautyWhite Aquarium Stand/Cabinet Unit - contemporary - furniture - kansas city - by Belak Woodworking LLCdiy oak aquarium cabinet | Cichlid-Forum • DIY 55 Gallon stand and canopy build on the cheapBuild Your Own Aquarium Cabinet 165004 - Woodworking Plans and Projects!How To Build Aquarium Cabinet 201715 - Woodworking Plans and Projects!room divider aquarium - just need to frame it out with some bead board - bottom cabinet doors - light on top - maybe planters....Woodworking Plans Aquarium Cabinet 170246 - The Best Image SearchHow To Build Aquarium Cabinet 213524 - The Best Image SearchTeal Cabinet Paint Color Inspirationteal-cabinet-paint-colors-sw MorePine Aquarium Cabinet Oak 48x18, All Glass Aquarium -- These quality pine stands and canopies are constructed entirely of solid wood.

Each stand and canopy is stained and finished with a waterproofing sealer that will protect them from splashes and other water damage. Canopies are available with full length doors that allow easy access to the aquarium top.Red Sea Fish Pharm ARE40210 Max 130 Aquarium Cabinet Stand, BlackArticle ~ How To - Build an ADA Style Aquarium Stand As I will say over and over, ADA makes some amazing aquariums. Again, ADA aquariums are worth every penny. Unfortunately, as all of us people in the US find out quickly, they just don't fit quite right into the American standard stands.
cheap aquarium siphonADA aquariums are measured using metric.
aqua oak fish tank for saleI picked up an ADA 120H in 2007 and after some immediate searching, it was clear that I would have to get a stand that was made to handle metric measured aquariums like ADA aquariums.
fish tank for laptop
While the prices of the ADA aquariums are worth it, I do believe the stands are like most of the ADA line, over-priced. I was left with having to build an ADA style aquarium stand. Here I will go through the steps I went through to create this ADA style aquarium stand. It took me about 40 hours to build this ADA style aquarium stand. I think the final product ended up much better then I envisioned, and I may be so bold to say that it is even nicer then the true ADA equivalent. Each picture below can be clicked to view a larger version.
outdoor fish tank melbourne Cost: Just over 300 US dollars in materials
hexagon fish tank replacement lid - 3 pieces of 3/4" Plywood - get the best quality you can find
fish tank belfast gumtree
- 1 2x2 stud for inside corner support - 2 pieces were glued and screwed together to create the main frame - The remaining piece of 3/4" was used for the doors and riser. - 2 pieces of 8x4' Formica - so many colors to choose from!! - Table saw (cheap one): - Circular Saw (good one): - Laminate Cutting Router bit - Contact Cement (Gel variety) NOTE: Formica is VERY SHARP when it is first trimmed. I cut myself more then I would like to admit. Ready for Putty and Formica Adding Formica - I added the first piece of Formica by gluing and letting adhere with some weight on top. I then trimmed it with the router. Formica is glued using contact cement. There are a few methods but they all have the same basic approach. I used this tutorial to help me. Formica on the back Formica on the Front Doors Open with Tank Close Up of Seams Conclusion - Overall I couldn't be more pleased with the results of this project. My tank has been standing on it for almost a year now with no problems!!

I will build more in the future for more ADA aquariums. I am looking forward to that. I hope this article on how to build an ADA Style Aquarium Stand was helpful for you. If you have any questions, please contact me at If you find this as helpful as a book you might have had to buy or a workshop you may have had to take, feel free to Help me continue helping everyone.It looks like the page you are looking for either no longer exists or has moved to a new location. Please visit our home page to start your journey again. is an online database that categorizes links alphabetically to resources found at other woodworking web sites. Founded in 1998, information is hand picked and new woodworking information is added every day. So if you are frustrated There is no cost to use the database. Registering is not required. should be able to browse the database and click through the links. considering the fact there are so many browsers out there being used, this site's software

might not allow some visitors to browse, it all depends on the Internet traffic, and your browser's compatibility. The online database is primarily four main sections, the Index of Links, the Free Woodworking Plans, the International Distribution Center for woodworking plans and the Buy It Then Build It section. The top of the database starts here.Bonus Download: Learn what’s really needed to keep your Betta happy & healthy with The Ultimate Betta Resource Guide. Click here to download now! It’s never a good idea to keep two male Betta fish together because they will quickly become aggressive and fight each other. But it is possible to keep them in the same tank using a tank divider. A tank divider splits your tank into two or more partitions so you can have two aggressive fish coexist together without fighting to the death. The infographic below shows the basics of caring for a Betta fish including habitat, behavior and optimal temperature.

Courtesy: That Pet Place If you have two Bettas, housing them in one tank with a divider will simplify caring for them because you won’t need two tanks, two heaters or two filters. You’ll just have one tank to worry about. The tank dividers that you get in stores tend to be flimsy and low quality, and most cost at least $10. It may also be difficult to get a pre-made divider to fit your tank just right. But did you know you can make your own divider that will be custom-fit and much sturdier for a fraction of the price? Read on for our list of 7 easy DIY Betta fish tank dividers and learn how to build your own. Contents1) Make a Simple Divider Out of Craft Mesh and Binder Spines2) Create a Craft Mesh Double Divider for Extra Security3) Make a Tank Divider Out of Plastic Egg Crate4) Construct a Sturdy Divider Using Cabinet Liner and PVC5) Create a Tank Divider Using Fish Netting6) Build a Heavy Duty Divider Out of Plexiglass7) Easy Custom Foam Filter and Tank DividerFinal Thoughts on Betta Fish Tanks with Dividers

— Kaylee Naspinski (@urhomedoge) July 1, 2015 This is an incredibly easy and effective tank divider using simple materials that you can pick up at any Walmart or craft store. You can custom cut it to your exact tank dimensions, and you can even customize the shape in case your tank has a bow front. Here are the materials that you need: A package of plastic mesh sheets (the kind used for needlepoint and craft projects). Plastic report cover spines (the plastic things used to clip report covers together. Available at any office supply store). Scissors or exacto knife Building this one is simple. First, measure and cut the plastic mesh sheets to match the width and shape of your fish tank. Next, insert each side into the report cover spines to make the divider sturdy and rigid. Then, slide the divider into your empty tank, and build up sand and gravel on either side. This divider works great and it’s cheap and easy to make. Watch the video below for complete instructions:

Watch: DIY Divider For Fish Tank For Less Than $2 — Justin Dennison (@justinsane1987) July 20, 2016 This divider is a twist on the basic craft mesh divider above. It adds a second screen and suction cups for extra security, and even gives you space to put an aquatic plant between the two sections. This divider is simple, looks great and will keep your fish happy. Here’s what you need: Plastic report cover spines Ruler, pencil and scissors/exacto knife First, follow the instructions above to make two tank dividers out of the mesh sheets and report cover spines. Next, line up your dividers with the suctions cups in between them (one on each corner, suction part facing out). Use the fishing line to secure the mesh to the loop on the back of each suction cup. Finally, slide your double divider into your tank and attach the suction cups to the glass. Just like the first one, you’ll want to build up sand or gravel on either side of the bottom.

You should have a sturdy double divider with enough space in the middle to add a plant! Check out the full instructions here. — Jamie (@_toshokan) November 4, 2015 Another option for dividing your tank is using plastic egg crate material that’s available at most hardware stores. Egg crate is thicker and more rigid than craft mesh. It also comes in bigger sheets, so it’s suitable for larger tanks. Sheet of plastic egg crate Here are the steps: To make this divider, measure your tank and cut the egg crate to fit. Then, simply wedge it into your tank and pile your sand or gravel substrate around the base. You can also attach suction cups for extra security. #akvaristan #aquarium #akvaryum #aquarien @fishtankfanatics A beautiful divided up Betta tank! — Akvaristan Akvaryum (@Akvaristan) February 4, 2015 If you want something a little more rigid than craft mesh, try this one out. This robust divider design uses PVC pipes, zip ties and that rubber material that you use to line the bottom of cabinet shelves.

It’s still cheap and easy to make, but the result is sturdier than a basic mesh divider. Straight lengths of PVC or CPVC Four 90 degree PVC elbows Black cabinet liner material Ruler, pencil, scissors, drill and something to cut the PVC with Build it this way: To build the PVC frame, first measure the interior dimensions of your tank and cut the straight PVC lengths to size. Attach them together into a square frame using the 90 degree elbows. Drill a few holes in each length of PVC so that they can fill with water. Next, cut the cabinet liner so that it is large enough to cover the PVC frame and fold over each side with some overlap. Fold the liner over the frame and use the zip ties to attach it. Finally, cut off the excess from the zip ties, and use a lighter or soldering iron to melt the sharp edge where you cut (you don’t want your fish slicing their fins on a jagged piece of plastic). Check out Diy Aquarium Divider for complete instructions:
This easy divider uses fishnet and rope to create a barrier between the two sides of your tank. The advantage of a net divider is that it allows for greater water flow between the two sides of the tank, so you can be sure that both sides are in balance. However, netting will allow greater visibility between the two tank sides so there’s a greater chance that your Bettas will notice each other. Buidling it is simple: To build it, simply measure out your tank and weave a rope through the netting to match your tank dimensions. Cut the net around the rope and you’ll be left with netting cut to the size and shape of your tank. Finally, tie a suction cup to each corner and you’re ready to attach it to your tank. Find the full instructions here. — Landscaping Today (@LandscapingToda) July 15, 2016 Making a divider out of plexiglass or acrylic glass is a great way to have a sturdy piece of material separating your tank. Even though it requires a little more in the way of tools, it’s still a simple divider to make.
Ruler or measuring tape Glass cutter, box cutter or circular saw Easy to follow steps: To make this divider, measure the interior of your tank and cut your sheet of plexiglass to size. You can cut the plexiglass with a circular saw, or you can use a glass cutter or box cutter to score where you want to cut and snap off the unwanted piece. Next, drill multiple holes in the glass so that water can flow through the divider. Finally, slide the plexiglass into your tank. If the glass is cut slightly larger than the tank, you should be able to just wedge it into place. If you’re unable to wedge it in or if you want more security, use silicone sealant to attach the plexiglass to the sides of your tank. — Joselyn (@acharmedonetwo) June 27, 2014 This divider uses a piece of foam and a pump to create both a divider and a filter. This can really help simplify maintenance in your Betta tank, and since the divider is the filter you can really make sure that both sides are being filtered properly.

Large piece of reticulated foam To build this, cut the foam to the size of your tank and bore a small hole towards the bottom for the vinyl tubing to snake through. Connect one end of the tubing to your water pump, wedge the foam into the center of your tank, and you’re ready to rock and roll. Check out Custom Cut Sponge Part 1 for complete instructions: A good Betta fish tank with a divider is a great way to keep two male Bettas in the same tank together. These easy DIY ideas for Betta fish tank dividers should help you create the perfect environment for your Betta fish, and you’ll end up with something much better and more unique than what you’ll find at the pet store. Before using a divider, make sure you have a big enough tank. Betta fish need at least 2.5 gallons of tank space, so you should never divide a tank smaller than 5 gallons. 10 gallon tanks should only be divided twice. Despite the many misconceptions about Betta tank size, bigger is always better.